From a standing position:
- Prior to installation, complete all floor leveling & tile preparation procedures to a CSP-2 or greater.
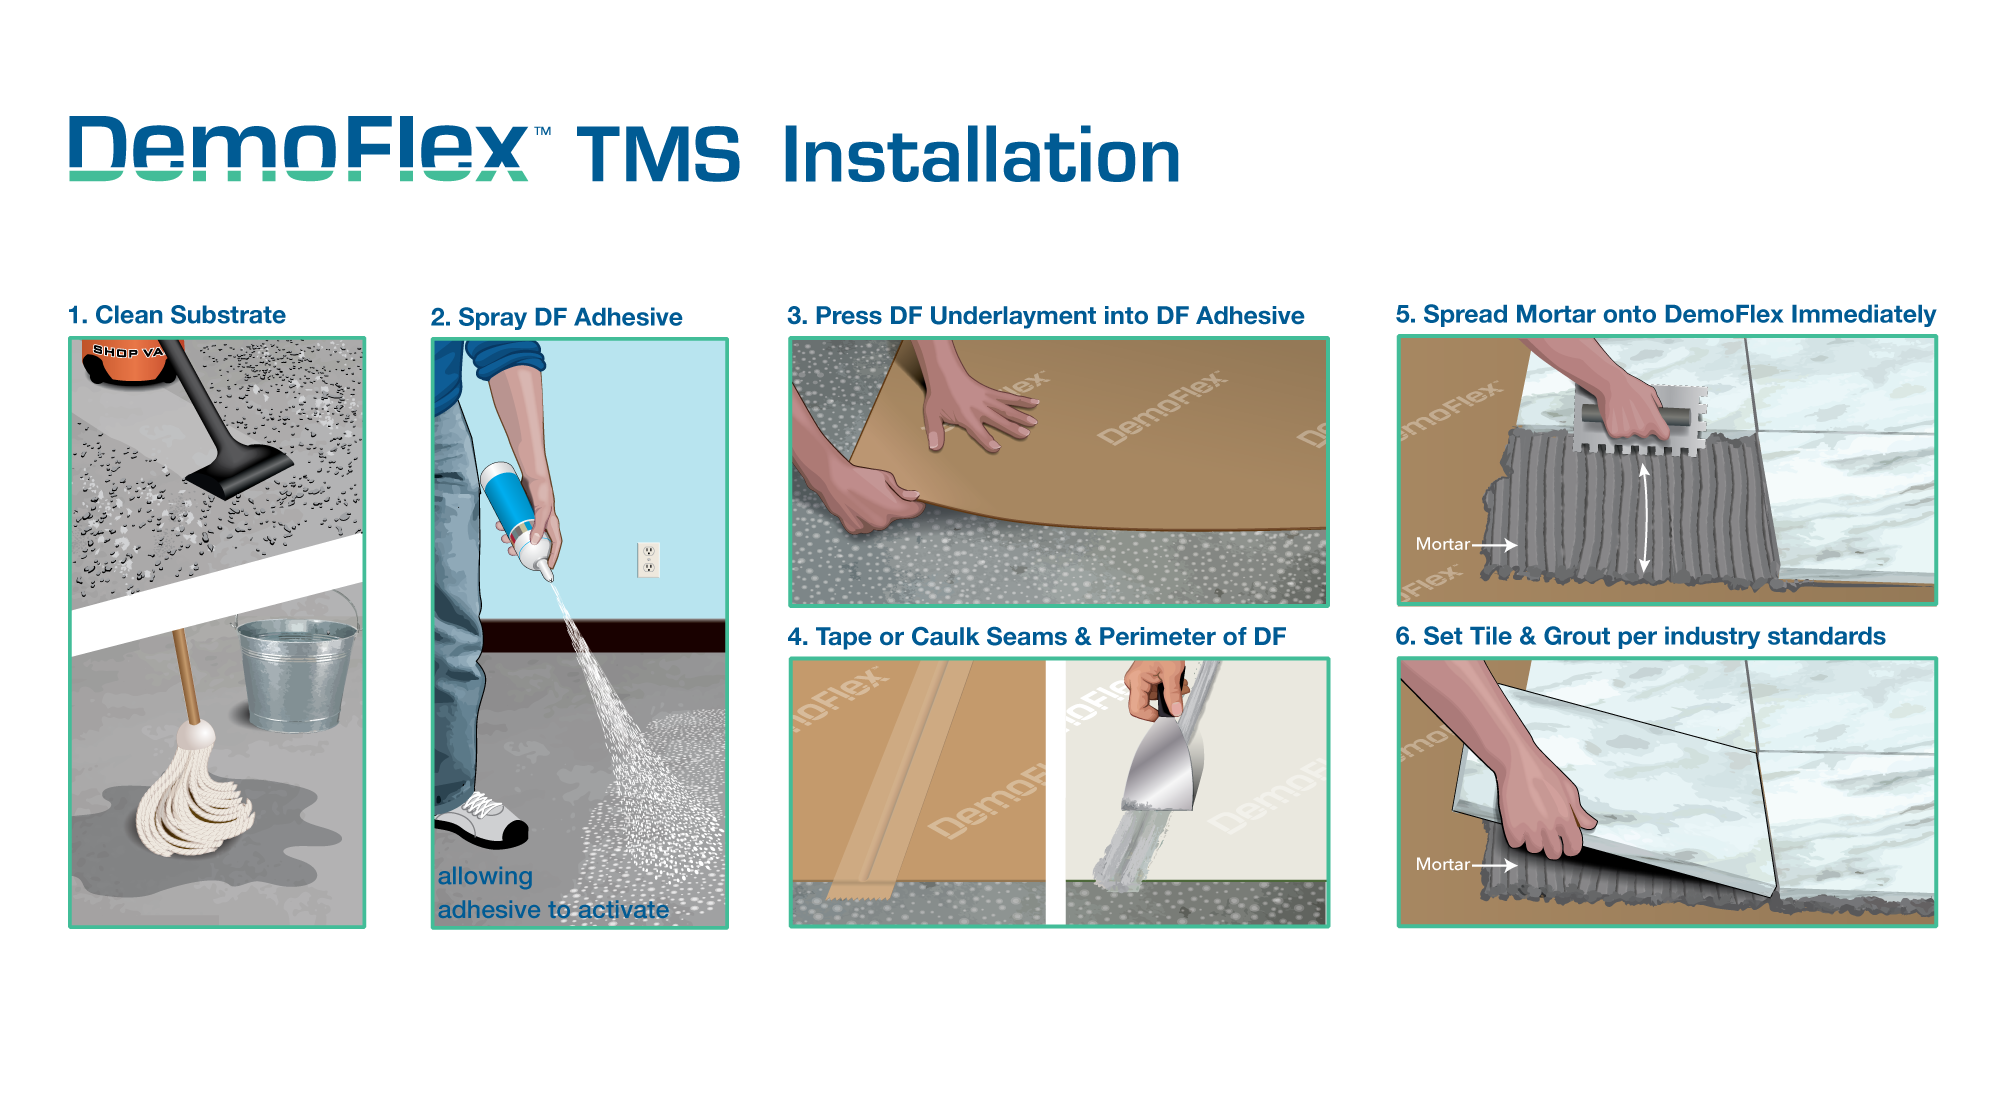
- Thoroughly clean & dry the structurally tile-appropriate substrate to be free from residue and dirt, including vacuuming & light damp mop if necessary.
- Spray the DemoFlex Adhesive onto the floor substrate.
- Wait approximately 20-40 minutes while the adhesive activates until it does not transfer to the skin. Use of fan recommended.
- Thoroughly press the DemoFlex TMS Membrane into DemoFlex Adhesive using a hand roller, weighted roller or by hands & feet.
- Bridge the seams of the TMS Membranes using DemoFlex Tape or sealer.
- Apply the DemoFlex Tape or sealer around the perimeter of the installation area.
- Spread mortar and set tile directly on top of DemoFlex Underlayment, using a quality, modified mortar & grout following industry standards. ‘Fast-set’ mortar is recommended for reduced curing time.